1.2 Viper 面板简介
Viper 是.NET6.0平台下基于Anno开发的Dashboard面板项目,包括集群看板、服务调用分析、服务接口文档、服务在线安装部署等功能。 也可以作为Anno入门的模板项目。
Viper http://anno.liqingxi.cn#
Java 实现 #
https://github.com/duyanming/anno.thrift-parent
1、运行Viper#
特别注意
Viper运行顺序为:ViperCenter=>ViperService=>ViperApiGateWay
数据库配置,可以是MySql、SqlServer、等其它数据库,一下采用MySql#
运行数据库脚本创建数据库
1、Viper\database\Viper20210201_01.sql
2、修改viperService 数据库连接字符串
配置文件:
Viper\ViperService\bin\Debug\net6.0\Anno.config
第一步:启动注册中心#
配置文件:
Viper\ViperCenter\bin\Debug\net6.0\Anno.config
- 进入项目文件夹
Viper\ViperCenter\bin\Debug\net6.0 - 运行命令
dotnet ViperCenter.dll - 看到下图 说明运行成功

知识导航
详细内容参照《2.1 注册中心》 章节。
第二步:启动 ViperService#
配置文件:
Viper\ViperService\bin\Debug\net6.0\Anno.config
说明
一般情况下只用修改 下面两行配置
ViperService 和 ViperCenter 可以不在同一台电脑,ViperService也可以采用不同端口运行多个Service 。ViperCenter 可以根据客户端请求自动负载均衡。高级用法随后介绍。
- 进入项目文件夹
Viper\ViperService\bin\Debug\net6.0 - 运行命令
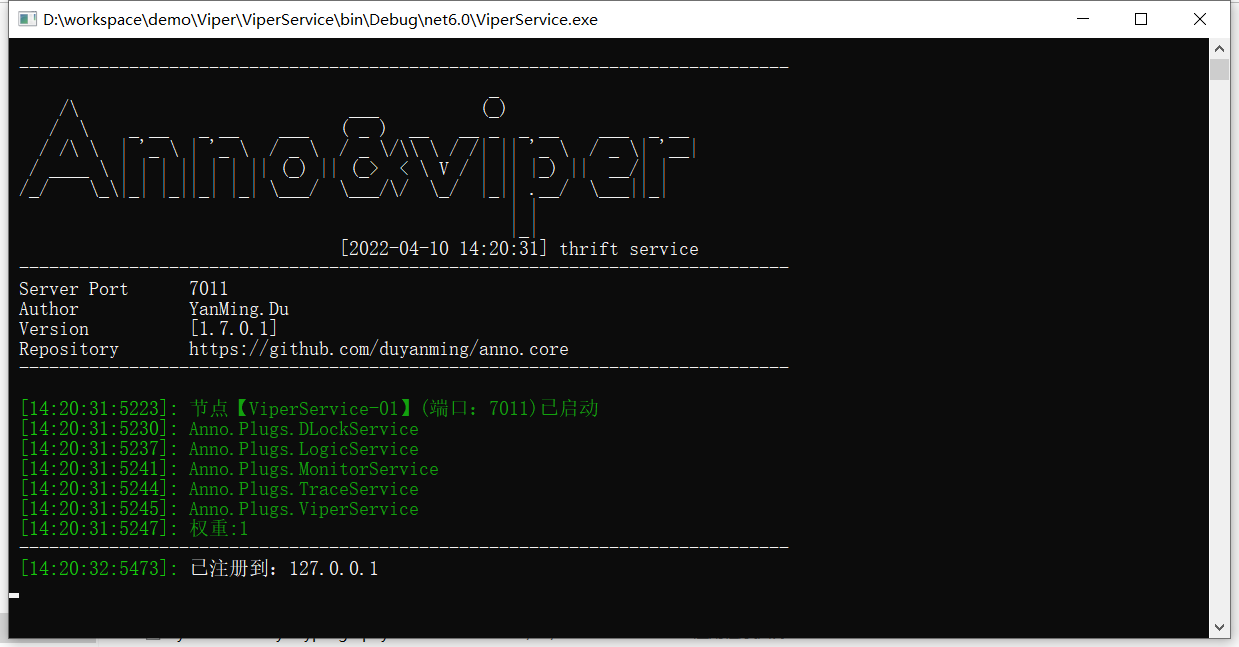
dotnet ViperService.dll - 看到下图 说明
ViperService成功运行 并且已经注册到 注册中心(ViperCenter)运行成功
启动 Viper.GetWay
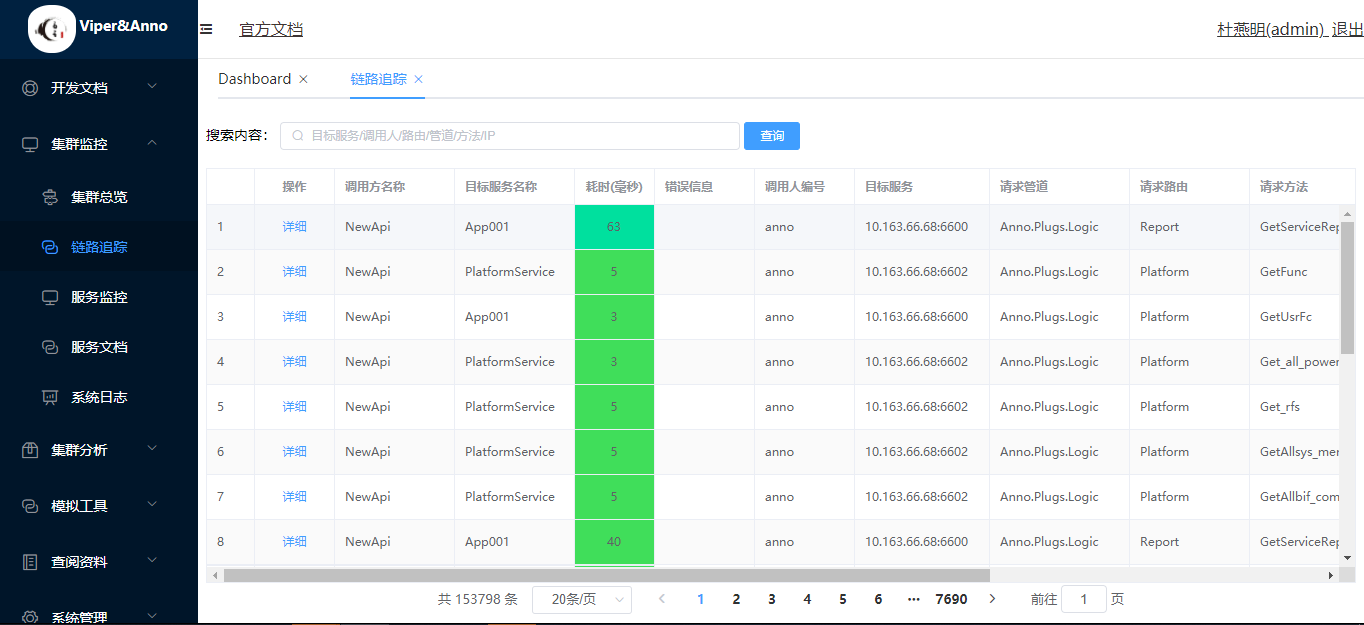
第三步:调用链追踪#
配置文件:
Viper\Viper\appsettings.json
链路追踪列表:
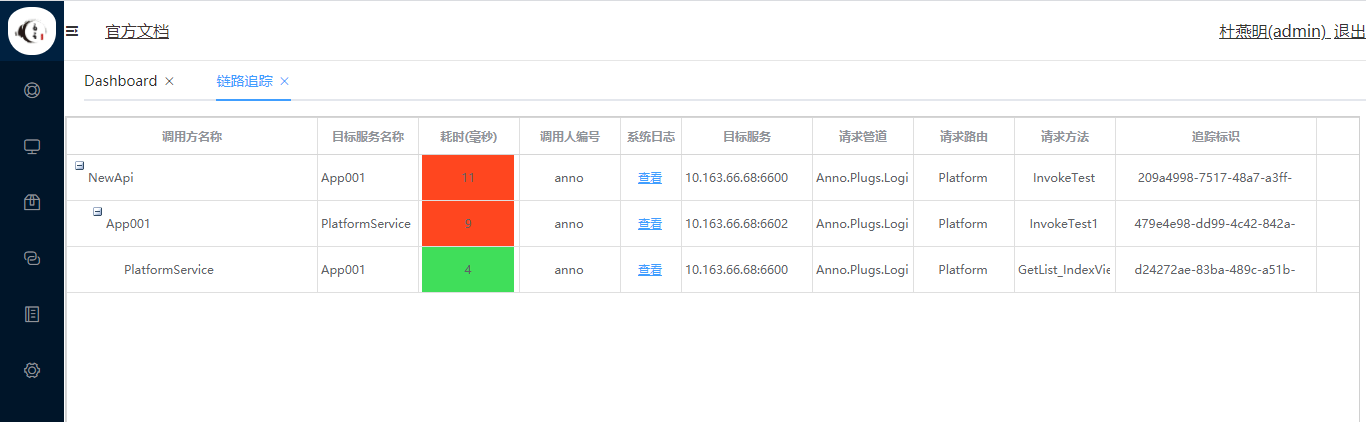
调用链详情:
第四步:集群路由信息#
集群路由列表:
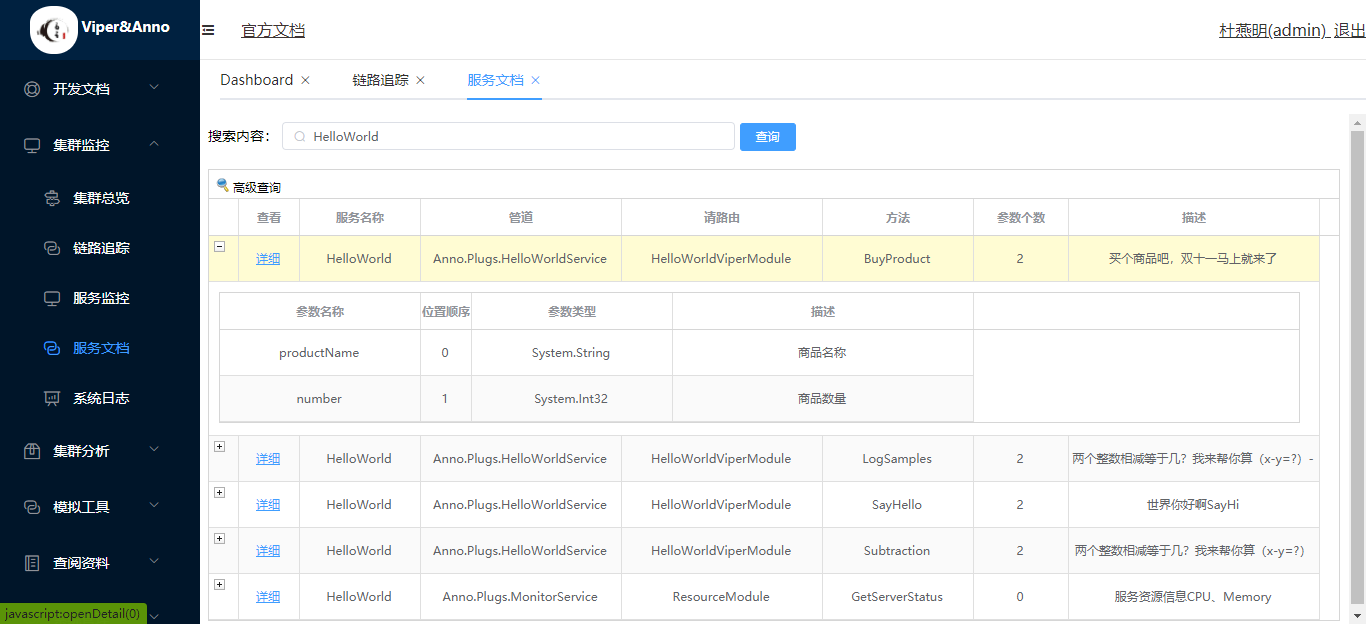
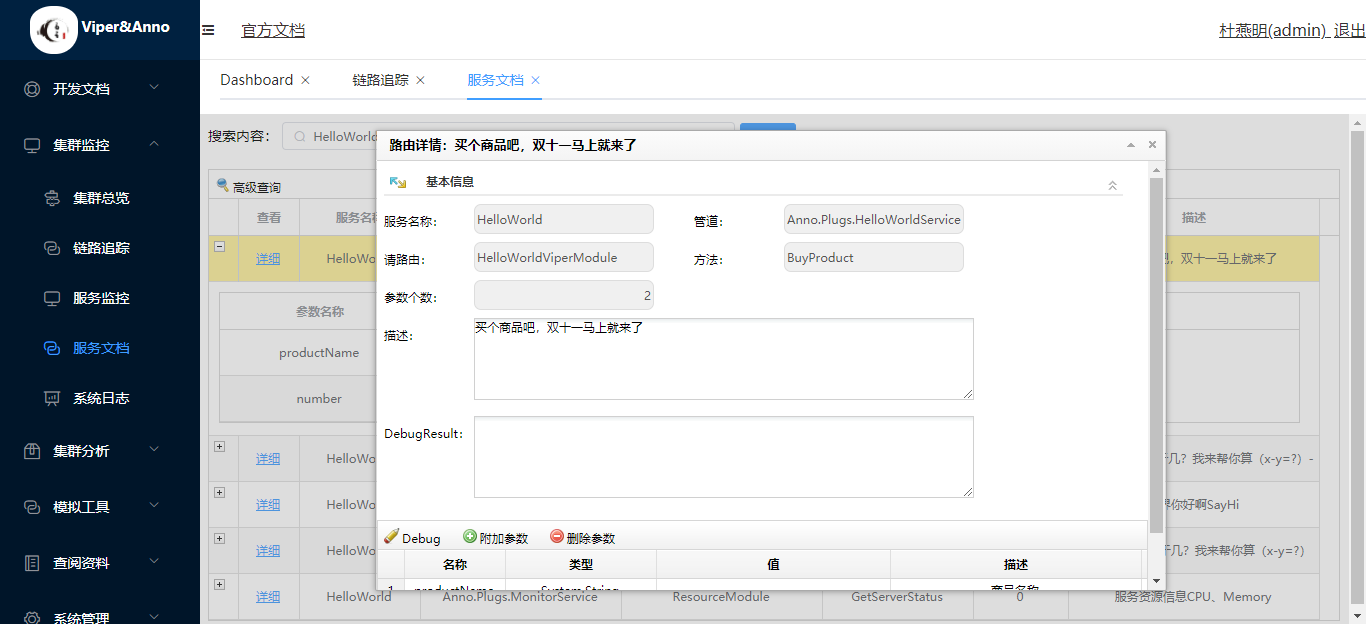
集群路由详情:
调试一个邮件接口
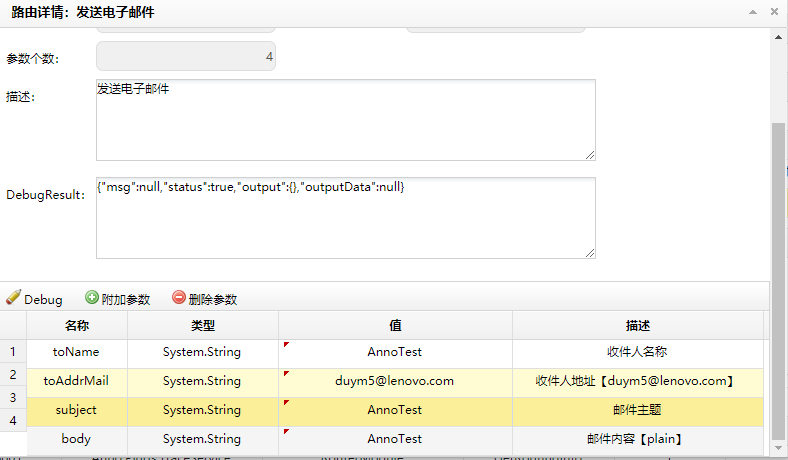
看到下面消息说明调用成功
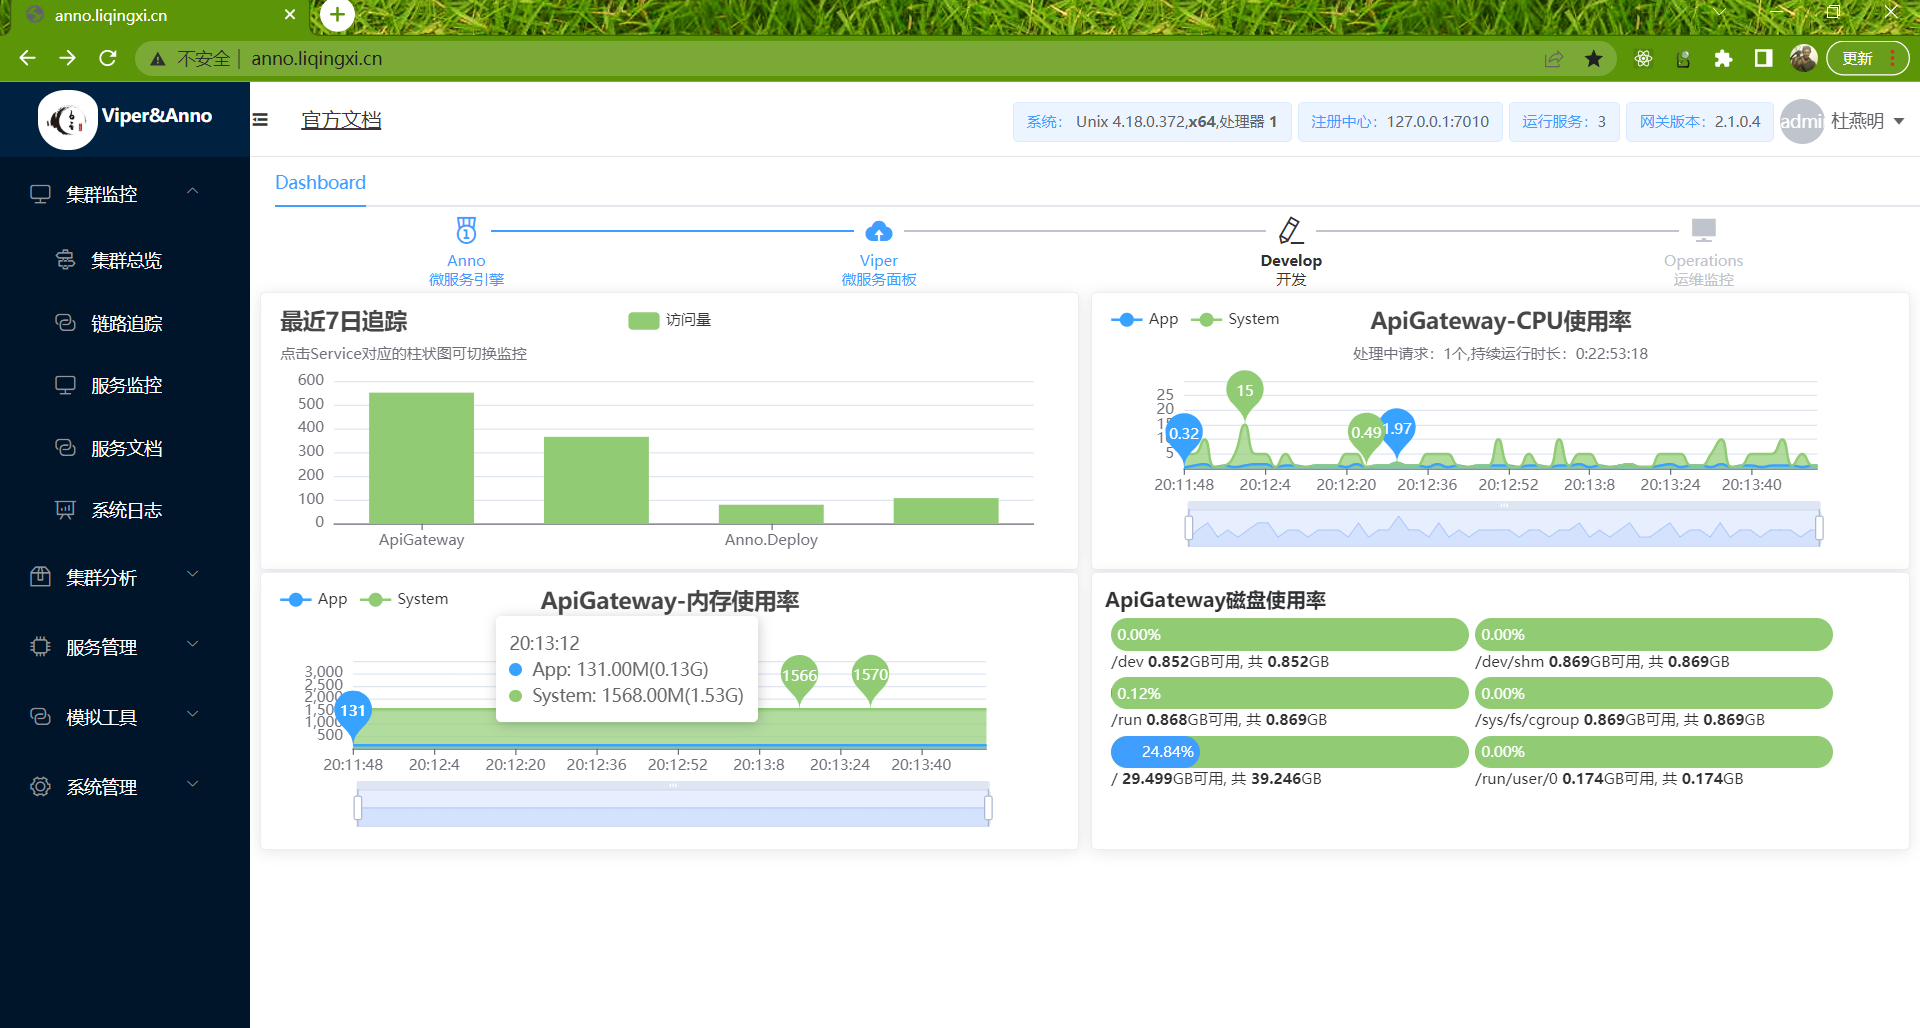
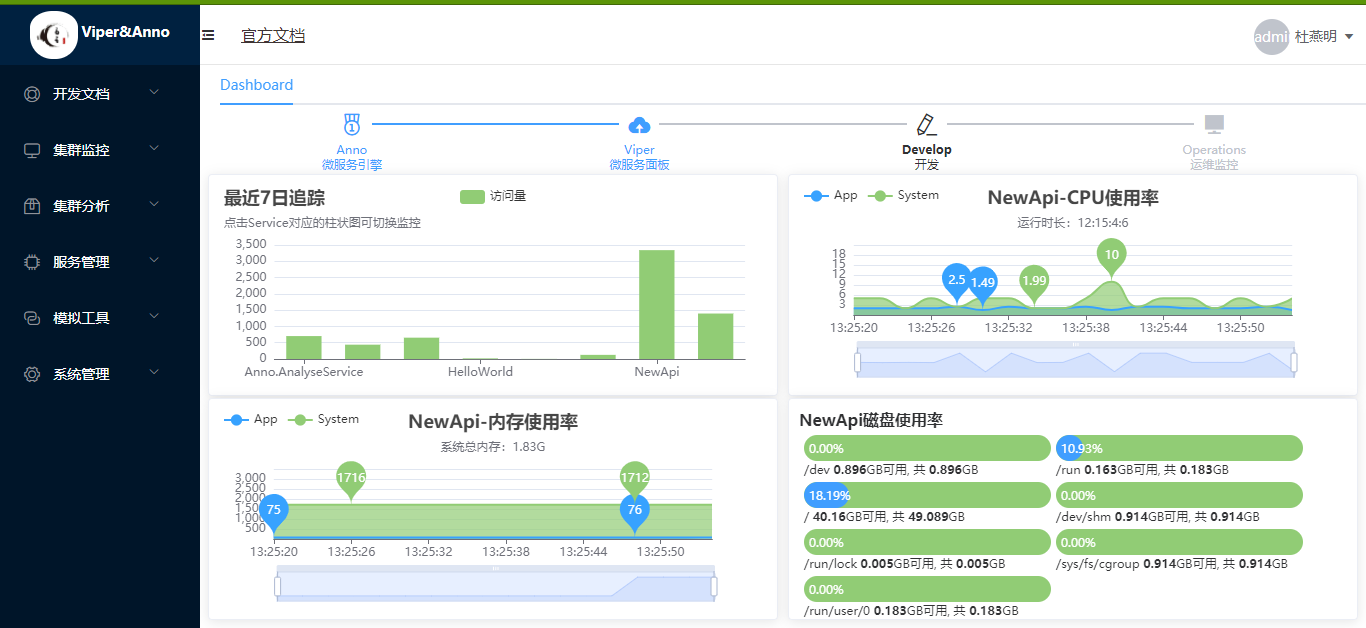
第五步:服务性能监控#
监控DashBoard
点击最近7日追踪柱状图可切换对每个服务Provider或者网关进行监控
2、Anno EventBus#
Eventbus Support InMemory and Rabbitmq