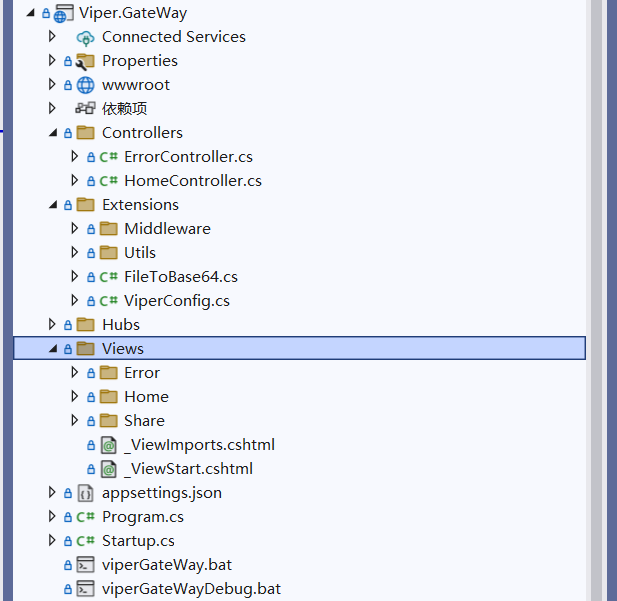
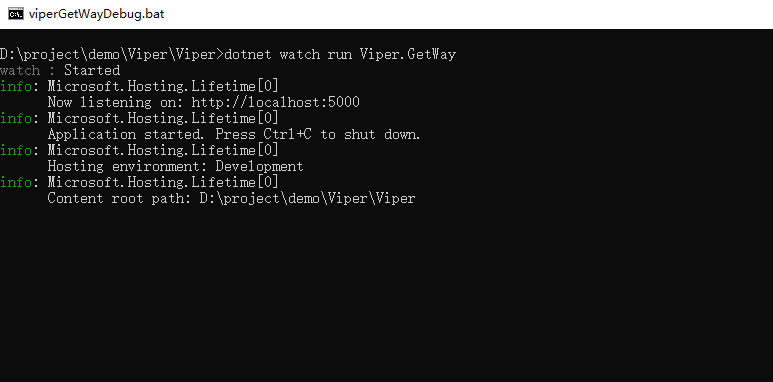
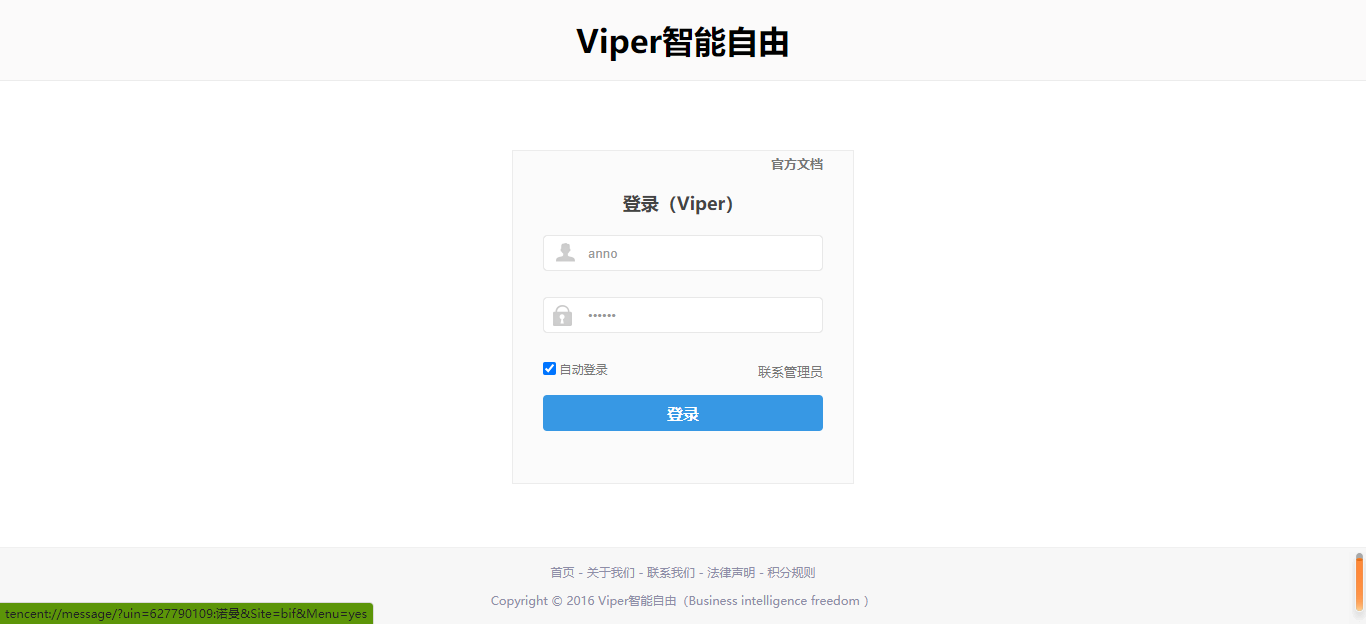
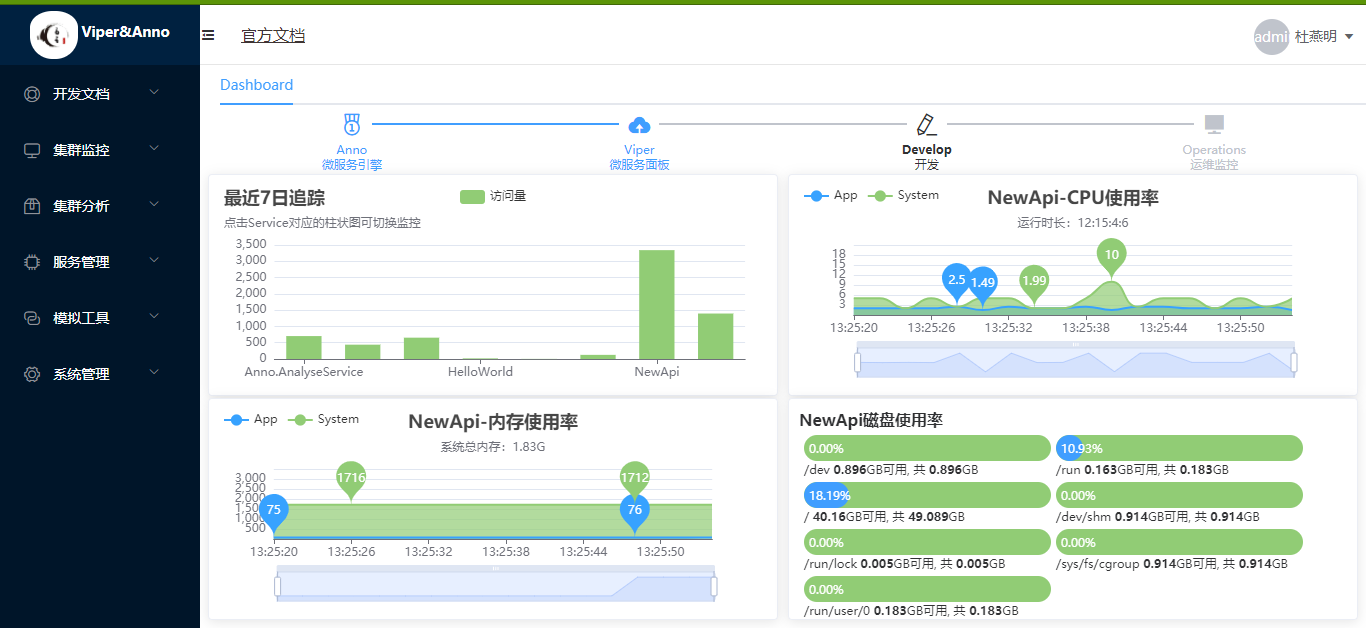
4.1 网关&监控4.1.2 源码结构#4.1.1 配置文件# 配置文件:Viper\Viper\appsettings.json{ "Target": { "AppName": "ApiGateway", //网关名称 "IpAddress": "127.0.0.1", //注册中心地址 "Port": 7010, //注册中心监听端口 "TraceOnOff": true //true 开启链路追踪,false 关闭 }, "Limit": { //网关限流 (每个服务也可以设定自己的限流策略) "Enable": true, //启用限流 "TagLimits": [ // 根据Tag标签限流 【channel】【router】 { "channel": "*", //匹配所有 "router": "*", //匹配所有 "timeSpan": "1", //时间片单位秒 "rps": 100, "limitSize": 100 //桶默认大小 } ], "DefaultIpLimit": { // 默认客户端IP限流 "timeSpan": 1, "rps": 100, "limitSize": 100 }, "IpLimits": [ //针对不同IP设置不同的IP限流策略 { "ipMatch": "0.0.0.1", //ipMatch参考IPAddressRange "timeSpan": 1, "rps": 100, "limitSize": 100 }, { "ipMatch": "192.168.0.10 - 192.168.10.20", "timeSpan": 1, "rps": 100, "limitSize": 100 } ] }} Copy4.1.3 运行图#发布或者从bin-debug 启动 发现没弹出启动信息不要紧张 需要在Getway(网关)的Program中ConfigureLogging的LogLevel.None 改为LogLevel.Information即可 目前支持两种Autofac、DependencyInjection,推荐Autofac4.1.4 浏览器打开监控网关#到此为止 Viper 已经完全运行起来了 开始你的体验之旅,更多详细精彩内容随后更新